Marnie's Macarons
Ingredients
Macarons
- 100 grams Almond Flour
- 100 grams Confectioners Sugar
- 70 grams Egg Whites room temperature
- 1/4 tsp Cream of Tartar
- 1/4 tsp Salt
- 1/4 cup Granulated Sugar (superfine works superwell)
- Gel Food Coloring (as desired)
Buttercream
- 2 Egg Yolks
- 1/4 cup Sugar
- 3 1/2 Tbsp Milk
- 1 stick Butter room temperature
- 1 tsp Vanilla Extract
Instructions
For the Macarons
- Weigh the almond flour and powdered sugar into your sifter, and sift them together TWICE. (if you don't, your macs will be grainy and have rough, sandy tops.)
- Wipe down the bowl of your stand mixer with a couple drops of white vinegar, make sure it's dry, then whip the egg whites on medium low until they start to foam.
- Add the salt and cream of tartar, then continue to beat on medium low as you add the sugar one tablespoon at a time so it can dissolve into the meringue.
- Beat on medium low (or bump it to medium if you're REALLY impatient, but the faster you beat them, the less stable your macs will be) until they form stiff peaks. Don't over-beat them, though, or you'll have problems that could range from bad feet to wrinkly, hollow shells.If you're adding color (and for the love of all that's holy, use gel or powder food coloring -- the liquid stuff will break your batter in a heartbeat!), add it when your meringue has soft peaks.
- As soon as your meringue hits the stiff peaks stage (congrats, you just made french meringue!), remove the bowl from the mixer and start your MACARONAGE! (yeah, that's just a super-fancy way of saying fold your sh*t together. But there IS a technique and it *matters* so here we go......
Macaronage
- Start by gently dumping your almond flour mixture atop your meringue. If your kitchen is particularly humid or the mixture has been sitting a while, or if you just want to, you can add a little extra air by sifting it in.
- Then, gently fold it all together until a thick drizzle of batter melts back into itself over about ten seconds. The batter will not be "smooth" but it will be evenly combined and somewhat thick, like lava. Overbeating (where the drizzle dissolves faster) will give you a loose batter which will make runny, misshapen, flat shells. Underbeating (where the drizzle holds its shape too long) will result in hard-to-pipe, misshapen, lumpy, nipply shells.Remember it's always easier to add a few strokes than take some away. Test early and often as you fold!
Piping and Baking
- Fill a pastry bag fitted with a round tip (I usually use a Wilton #12) with the batter, and pipe onto parchment or a silicon mat on top of a baking sheet in even 1- to 1 1/2-inch rounds. Thwack the pan FLAT on the counter a few times to release any air bubbles that may be in the batter. (This is easier to do with a regular half-sheet pan with sides, but I still prefer a rimless insulated sheet pan for piping and even baking. it's a trade-off, but you will have to be more careful thwacking a rimless sheet.)
- Let the shells rest about 30 minutes or until a light skin forms. You should be able to gently touch the top of a raw shell without it sticking. During the last portion of this rest, preheat your oven to ~300º F
- Bake the macarons, one sheet at a time, at ....a custom temp for ......a custom amount of time. Seriously, every oven is different, and this will take a little trial and error to get the perfect combination for your kitchen.START at 300 for 14-18 minutes, watch them closely near the end, and experiment from there. If they get too brown or you get overblown feet, turn your temp down a little bit and try a little shorter bake time.If they have no feet or stick to the silpat or parchment, turn your temp up a little and try a little longer bake time.
- Cool them on their sheet on a cooling rack for about 15 minutes, then remove them directy to a wire rack until they are cooled completely.
Now the buttercream filling!
- In a small saucepan, whisk the egg yolks until they're smooth, then add sugar and whisk until it's all smooth, and a pretty pale yellow, then whisk in the milk.
- Heat over a low flame, stirring often, until the mixture is thick but not scrambled eggs.
- Pour the mixture into a mixing bowl and let it cool to room temperature.
- Mix the softened butter in a few tablespoons at a time, then add the vanilla and mix until it's smooth. (i use a hand-mixer for this step)
- Transfer to a clean piping bag to fill the macaron shells.
- Refrigerate the filled macarons for at least 12 hours before serving (the filling will just soften the shell bottoms into the proper chewy texture...if you eat them early, they'll just be a bit more crunchy). They will keep, refrigerated in an airtight container, for up to five days or so, or in the freezer for several months. (The internet says five months. I've kept them as long as a year, and while they do lose a little bit of their pizzaz, no one got sick... ¯_(ツ)_/¯ Store at your own comfort level.)
Notes
Note: Macarons are finicky. Some of it is technique and some of it depends on the weather, the oven, and maybe even a little bit of luck. It will take several tries to get them "just right" and even the pros get hollow shells or blown-out feet on occasion. The good news is that even the "bad" batches are DELICIOUS and you can still bring joy to the people you love with marginal macs. <3
A definitive troubleshooting guide (which details the causes of all the common mac mishaps including lopsided, cracked or hollow shells, foot issues that even a podiatrist can't diagnose, or the dreaded "nipples") can be found here.
Another note: measuring by weight is both more accurate AND easier than measuring cups. And since we've already established that macs are finicky, that $14 kitchen scale will pay for itself by saving at least a couple ruined batches.
Yet more notes, specific to the macaronage: there are lots of videos and great debate around the internetzes about the *proper* technique here, but in the end, the result is what matters. I sweep about halfway around the bowl, then back through the center, turn the bowl and repeat, counting my strokes in groupings of five. I start testing the consistency at about 45 strokes, and it usually is done in 50 to 60 unless the day is unusually dry or i have overbeaten the egg whites. That said, it has taken me more strokes to get the right consistency for macs if it's a really dry day, or if cocoa powder or pistachio flour makes up part of the flour weight.
Wait, what? Cocoa Powder? Pistachio flour? ...yep. Once you get this technique down, you can experiment with the flavors, replacing some of the almond flour (by weight--make sure you end up at 100g!) with other ingredients. Keep a close eye on moisture content, though....the more moisture/fat you add, the more touchy your macs will be.
OMG, MORE NOTES? Yeah. Templates are Queen (or King, or the gender-neutral monarch of your choice). Mainly for when you're piping your shells.....As much as I want to affirm your freedom for you to do you, the more uniform your rounds are, the easier it will be to match them up to make pretty little sandwiches. So use a template. You can download the one I made here.
I printed two copies and taped them together since I use a big pan. I slide it UNDER my silicone mat, pipe the shells, then VERY GENTLY slide it back out and pipe the next batch. If you're even slightly clumsy (as I am), you might wait for a bit of a skin to form BEFORE you pull the template out from under the mat. I've ruined more than one batch by being impatient.
AND NOW FOR THE OVEN: Timing and Temp will vary greatly based on your own oven, the humidity, the macaronage, and really just the general mood of the Baking Gods.
For *my* oven (which is gas convection, so that adds even a little bit more to adjust for), in the winter when humidity is lowest, I've landed on a 20-minute rest, 290º convect for 12-14 minutes with a pizza stone on the bottom rack to even out the heat.
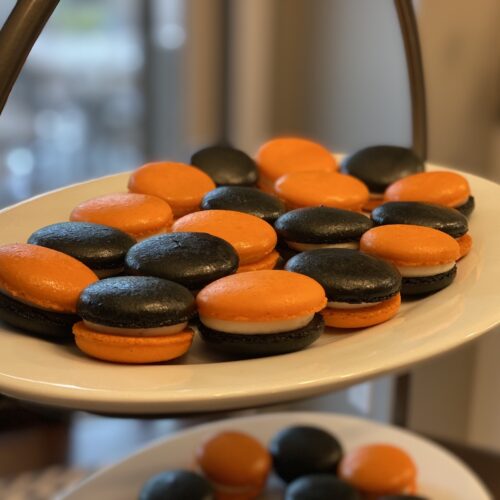
When the humidity is higher, I bump the temp up to 295, let them rest a full 30 minutes, and go the full 14 minutes...and I try to pick colors where a little extra browning won't be noticeable. Thank goodness my daughter's school colors were orange and black!